Documentation
Getting Started
Devices and Assets
Publishing and Display
Scenes and Patrol
Management and Settings
Troubleshooting and Support
Scenes (Presets)
1. Add a scene tour
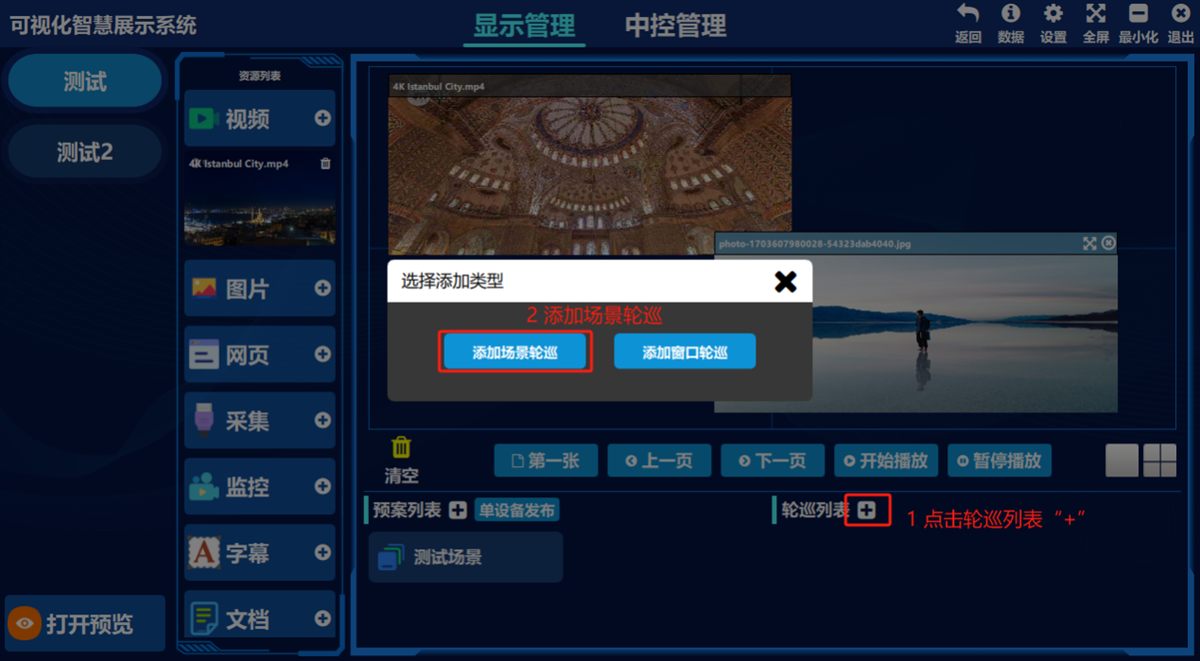
- ① Click the add button next to the tour list, ② click 添加场景轮巡(Add Scene Tour)
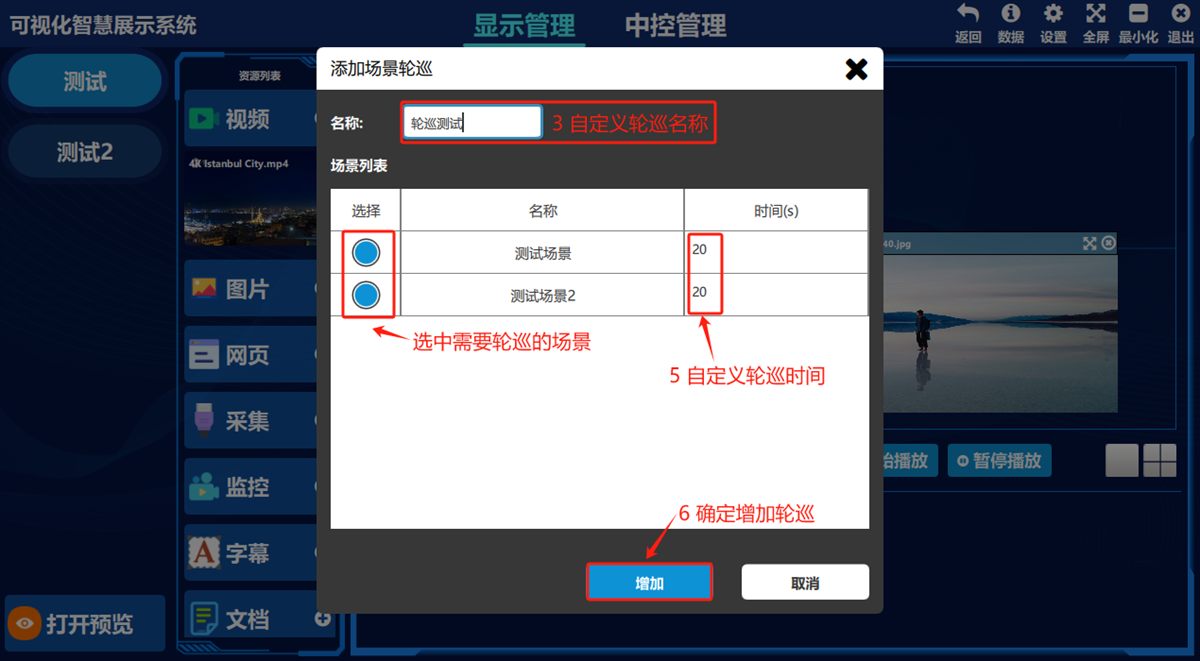
- ③ Enter a scene name, select the scenes to include in the tour, set the tour time and click 添加(Add).
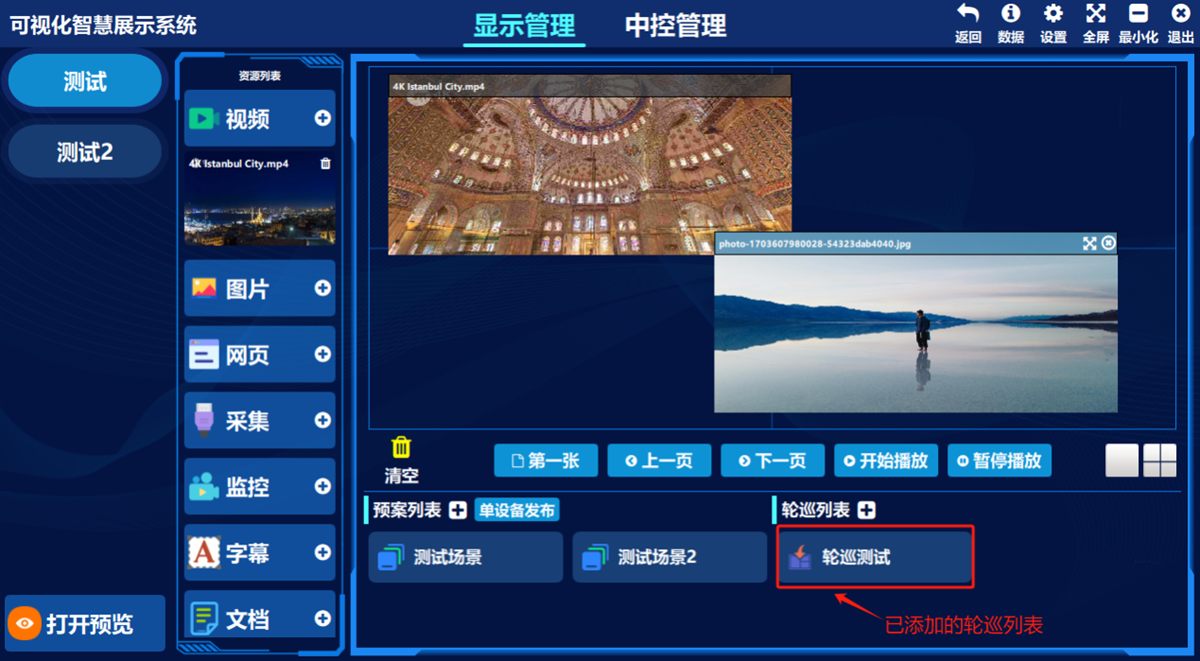
(Illustration) The list of added scene/preset tours:
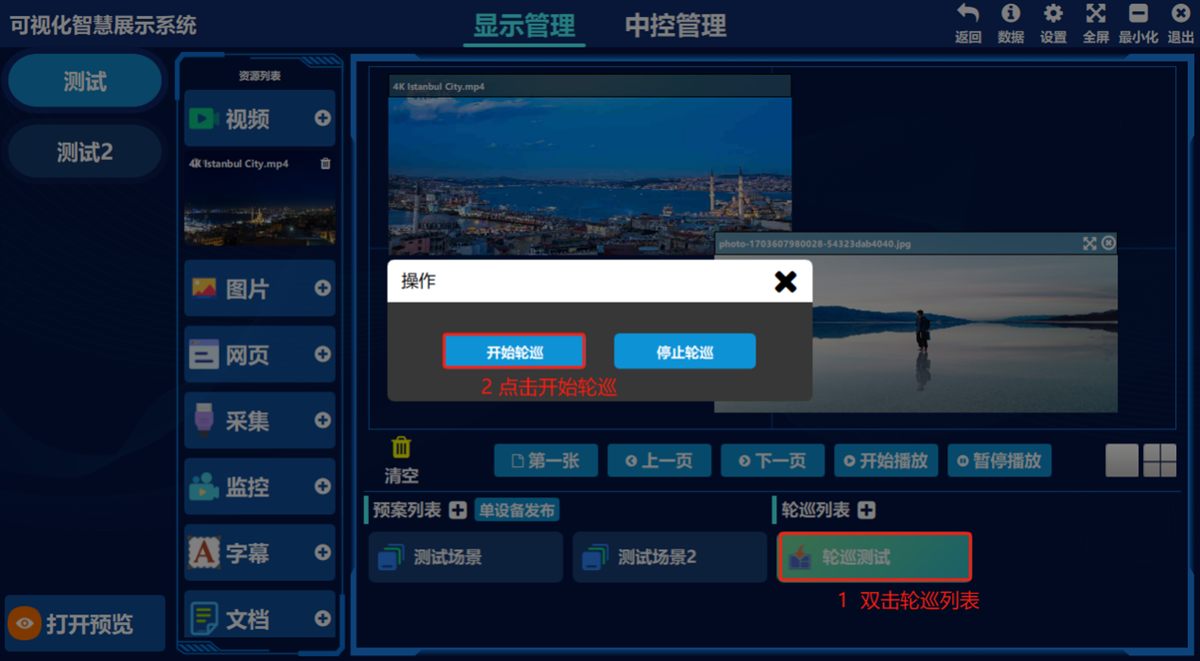
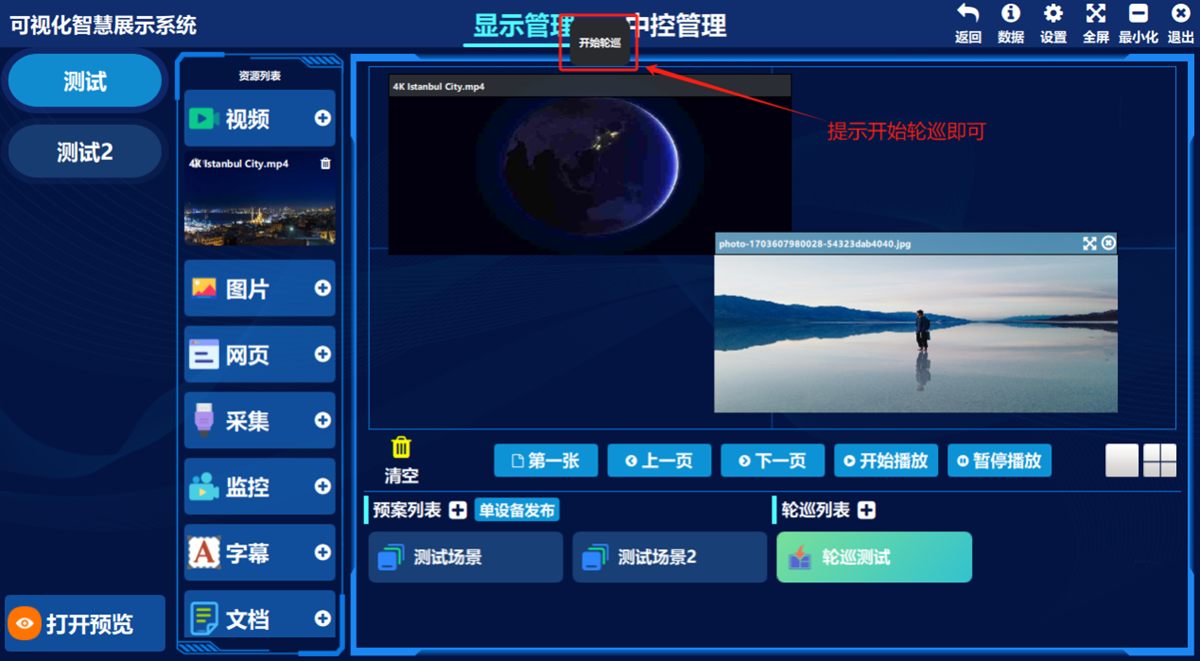
Start a scene tour
Double-click the scene tour preset and choose 开始轮巡(Start Tour) in the pop-up box; the software confirms that the tour has started.
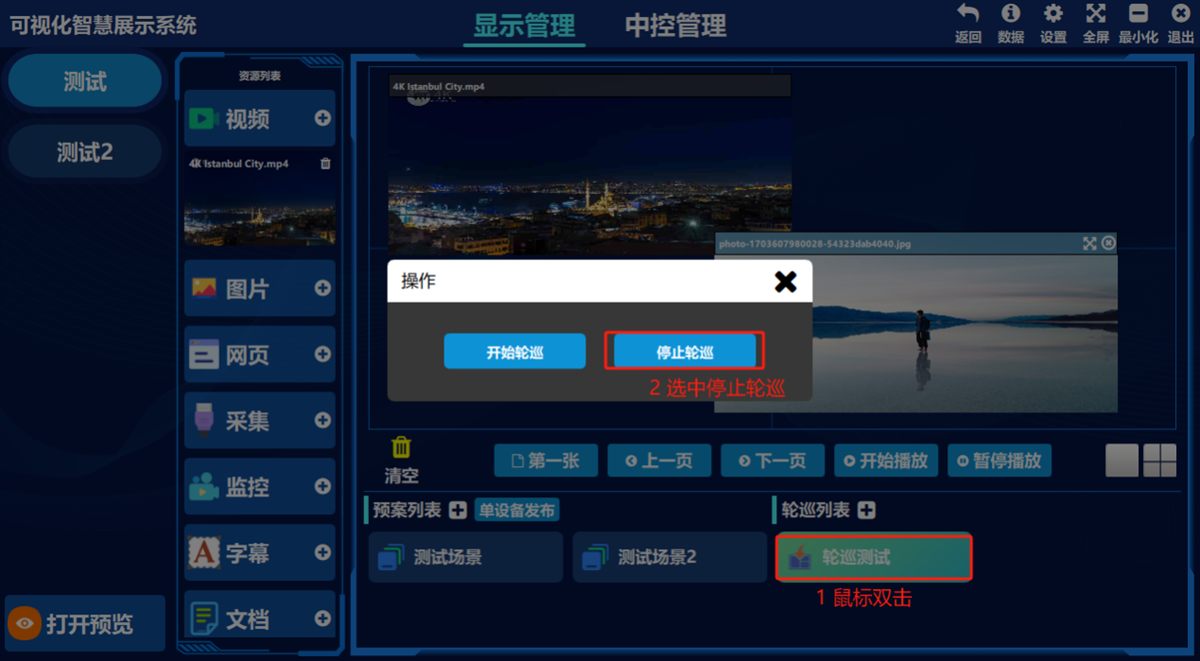
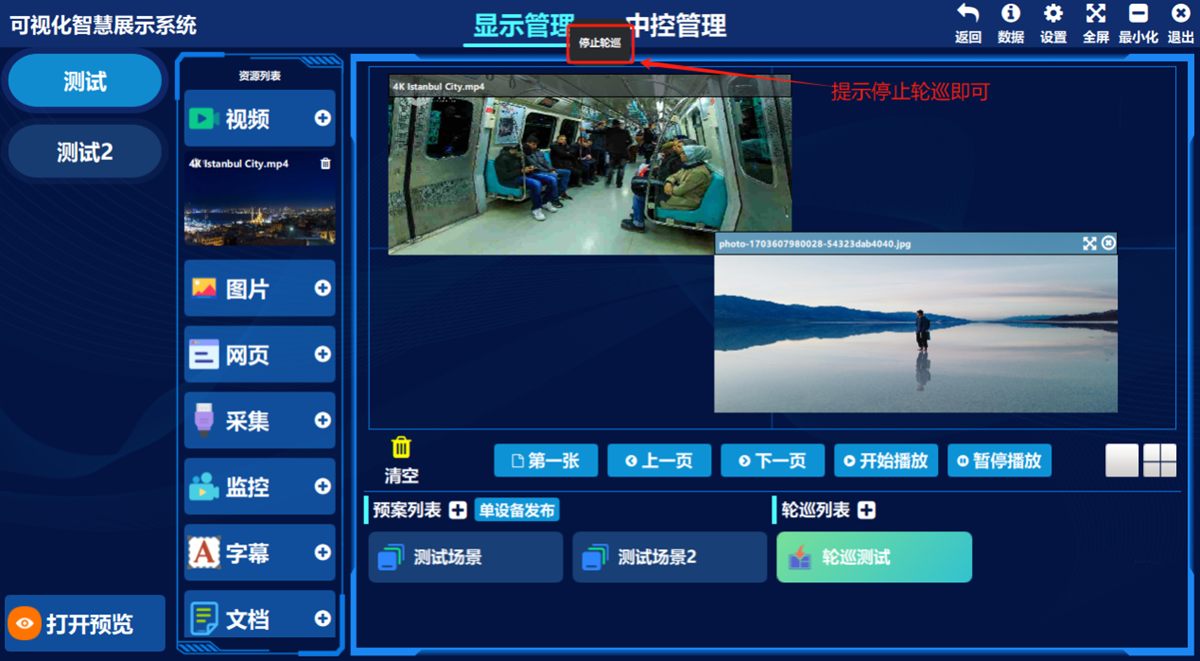
Stop a scene tour
Double-click the scene tour preset and choose 停止轮巡(Stop Tour) in the pop-up box; the software prompts 停止轮巡(Stop Tour).
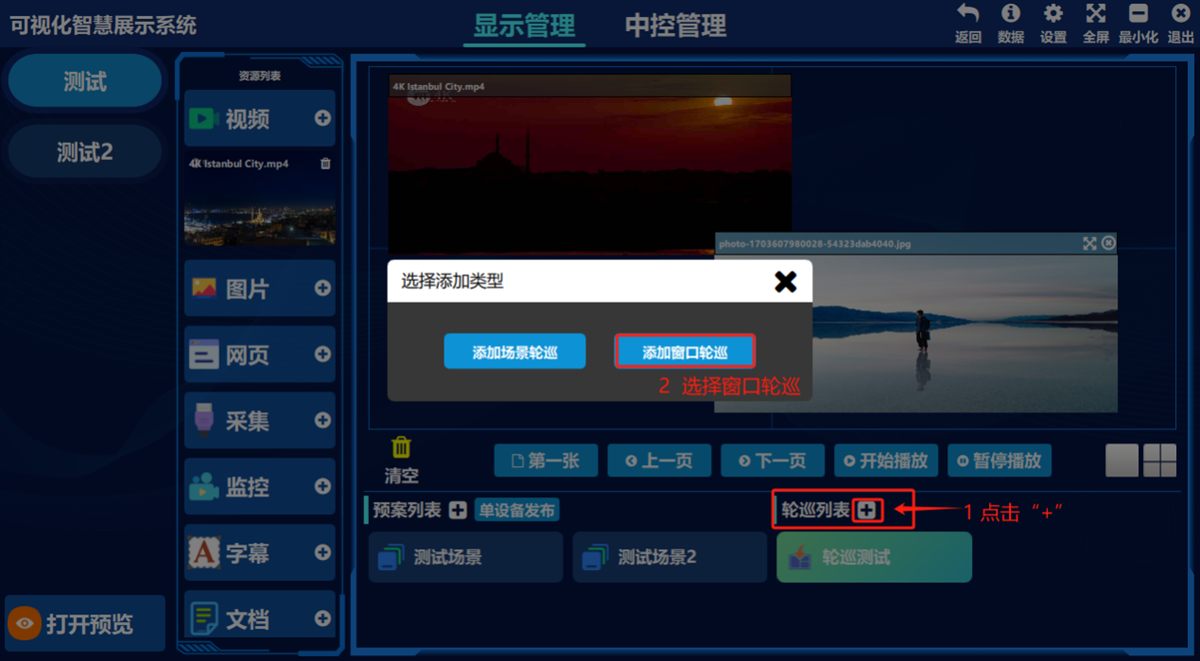
2. Add a window tour
- ① Click the add button next to the tour list, ② click 添加窗口轮巡(Add Window Tour)
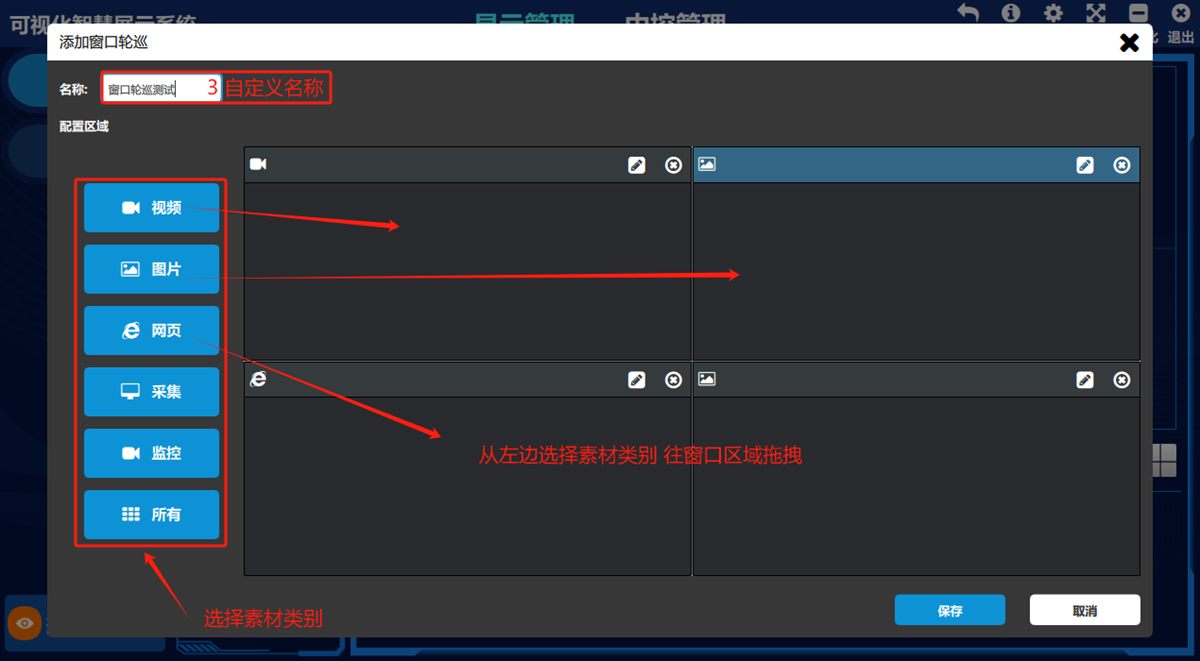
- ③ Enter a window tour name, select an asset type on the left, hold the left mouse button and drag it to the window area to place the asset (you can configure full screen or a multi-way split, depending on the current device layout)
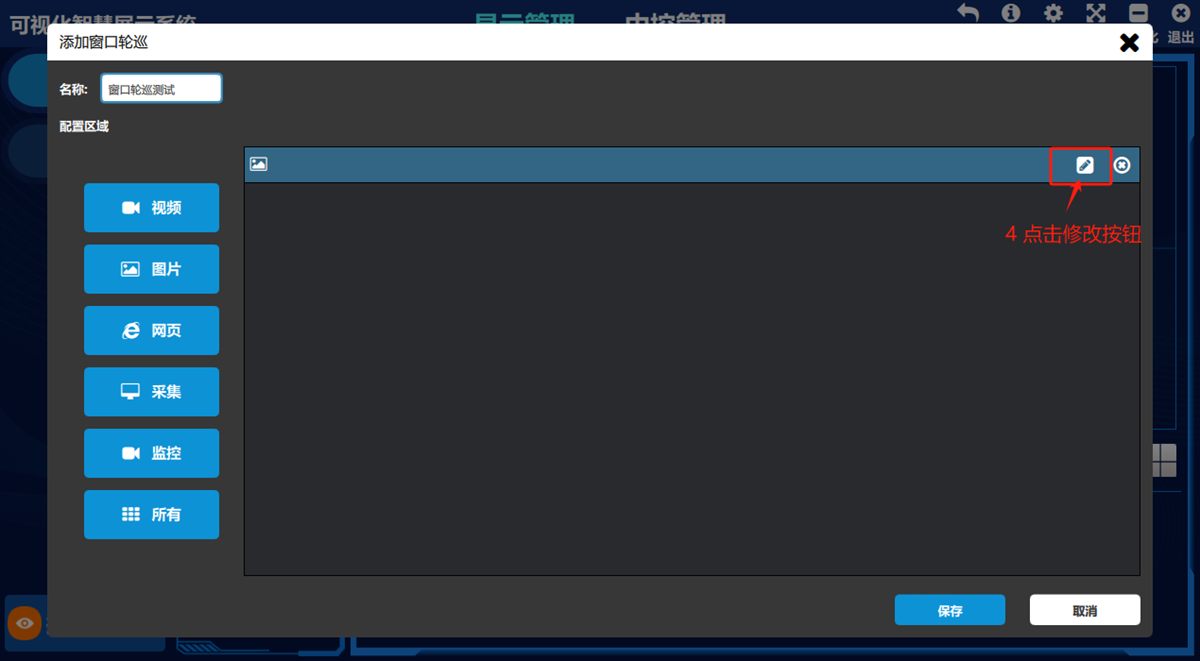
Then click the modify button shown below
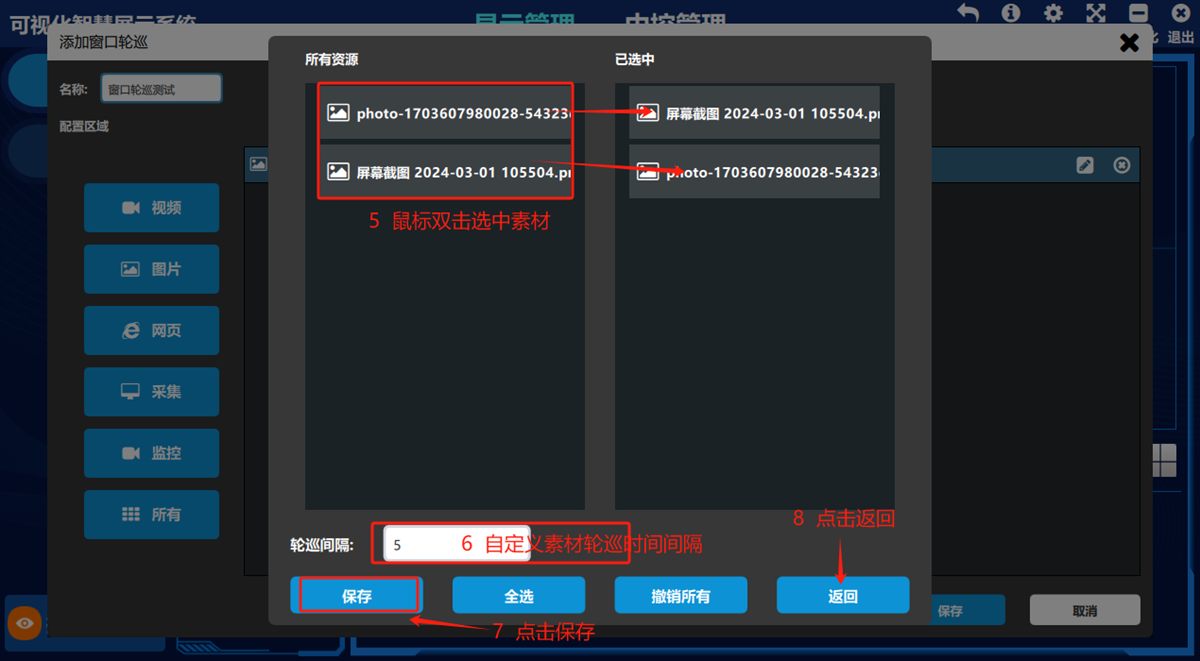
Double-click to select assets, set the tour interval, click 保存(Save), then click 返回(Back)
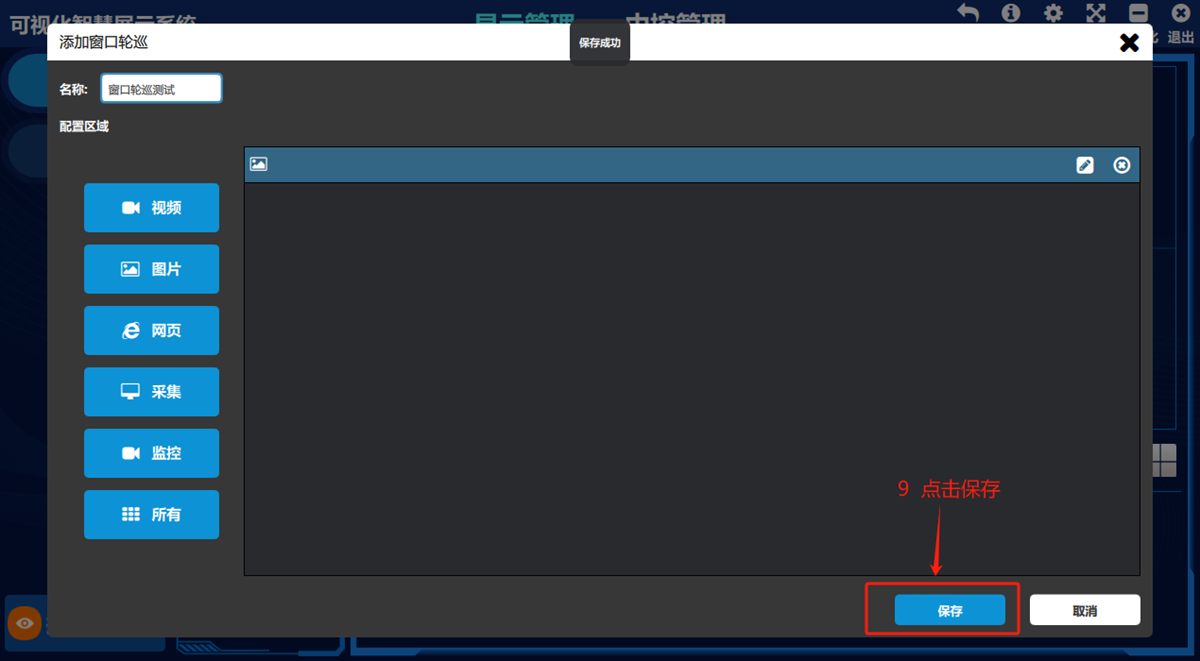
Click 保存(Save) once more; the prompt 保存成功(Saved successfully) confirms it.
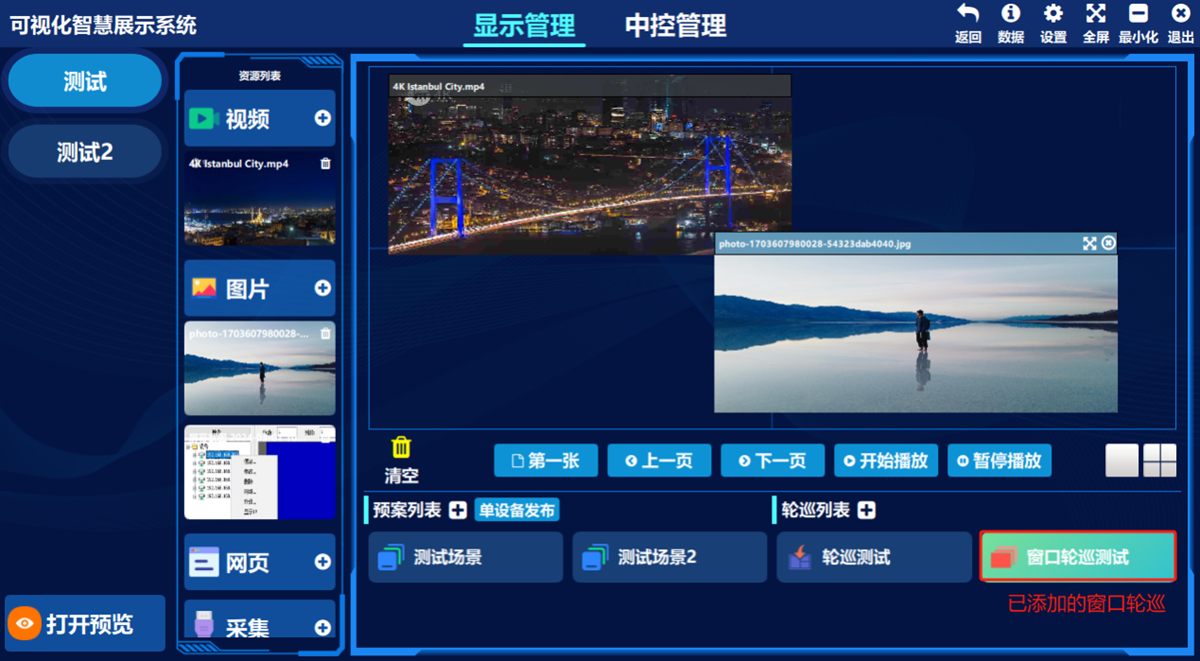
Start a window tour
Double-click the window tour preset and choose 开始轮巡(Start Tour) in the pop-up box; the software prompts 开始轮巡(Start Tour).
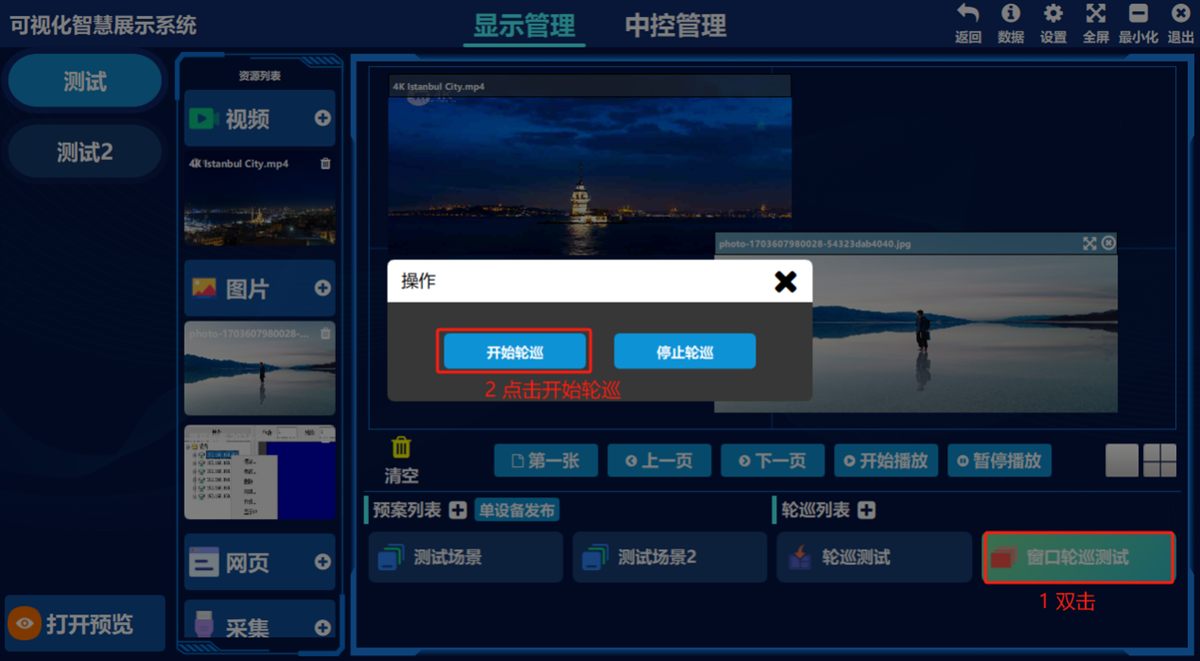
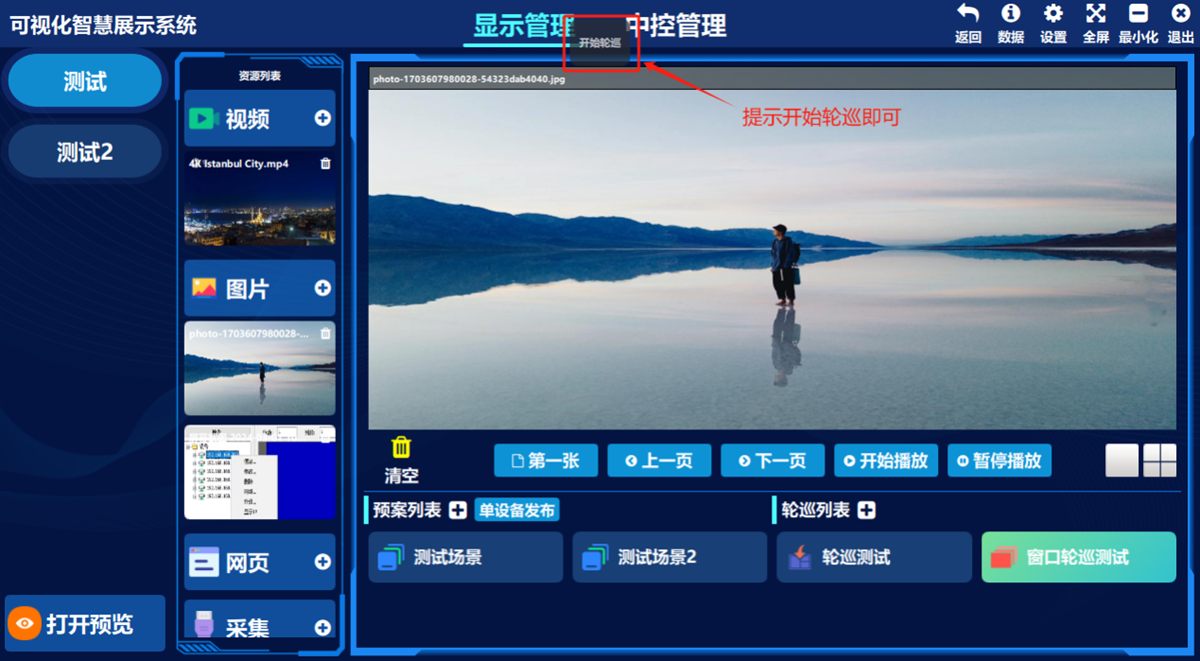
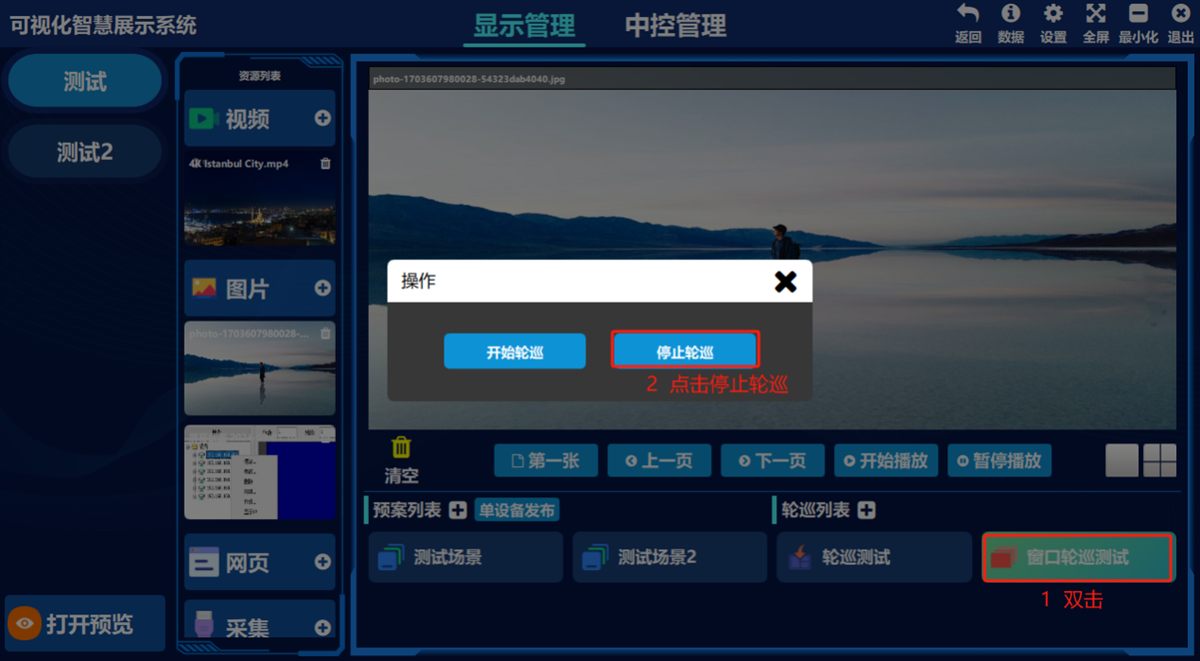
Stop a window tour
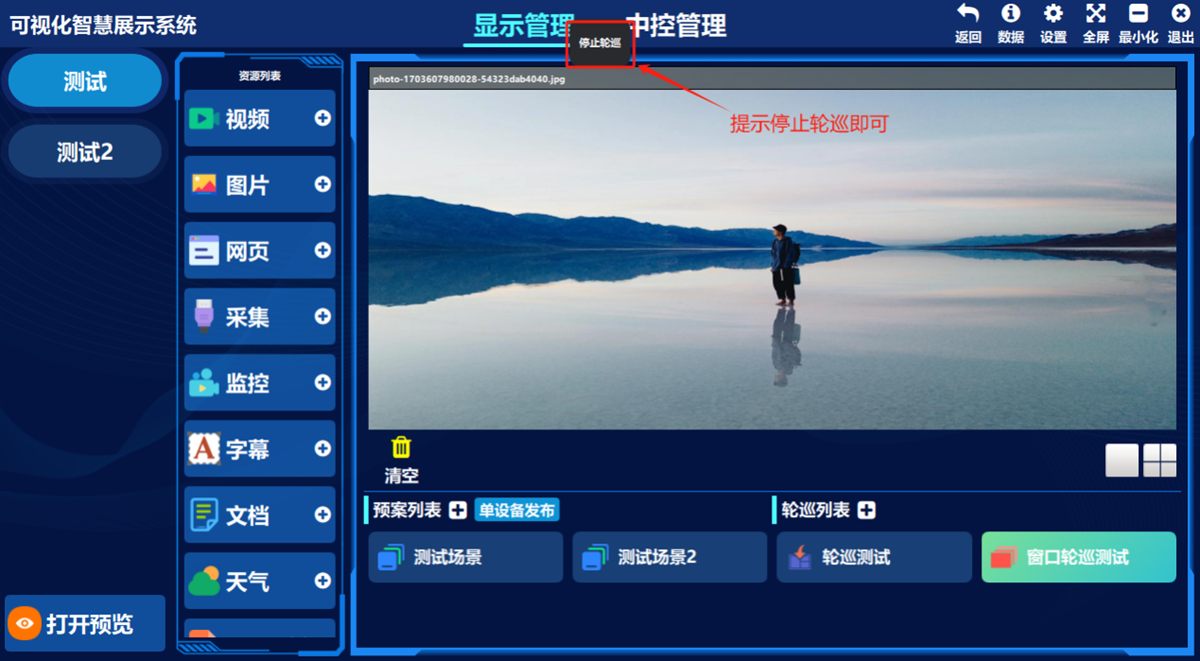
Double-click the window tour preset and choose 停止轮巡(Stop Tour) in the pop-up box; the software prompts 停止轮巡(Stop Tour).
Modify a window tour
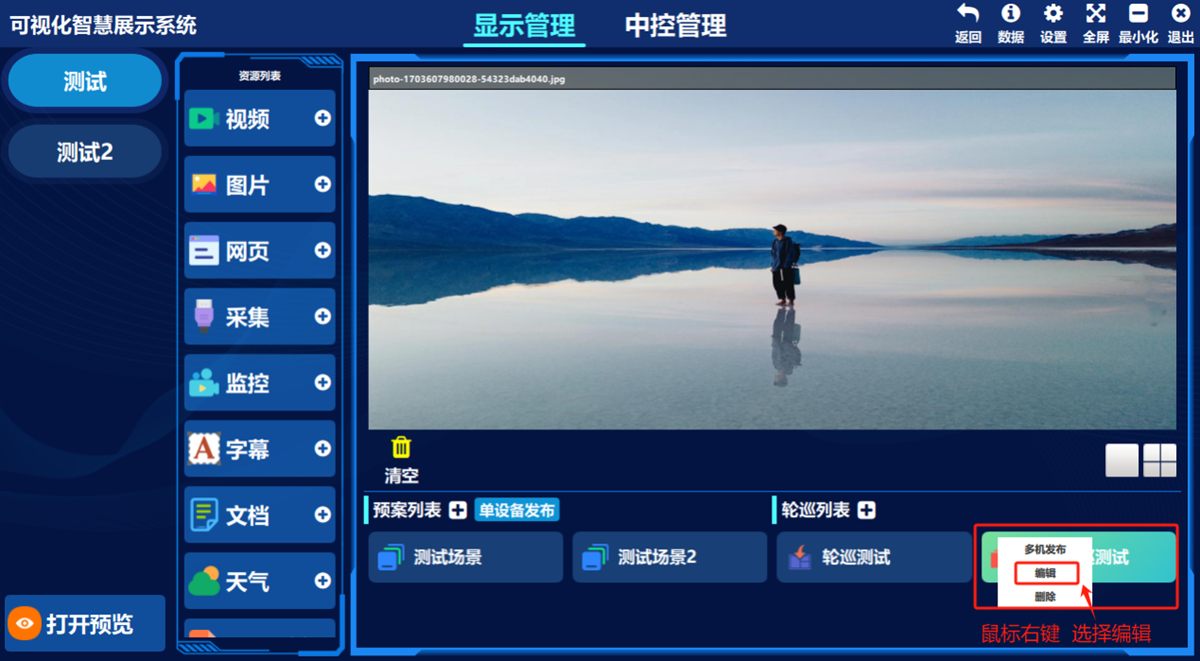
- ① Right-click the window tour preset, ② click 编辑(Edit) in the pop-up box
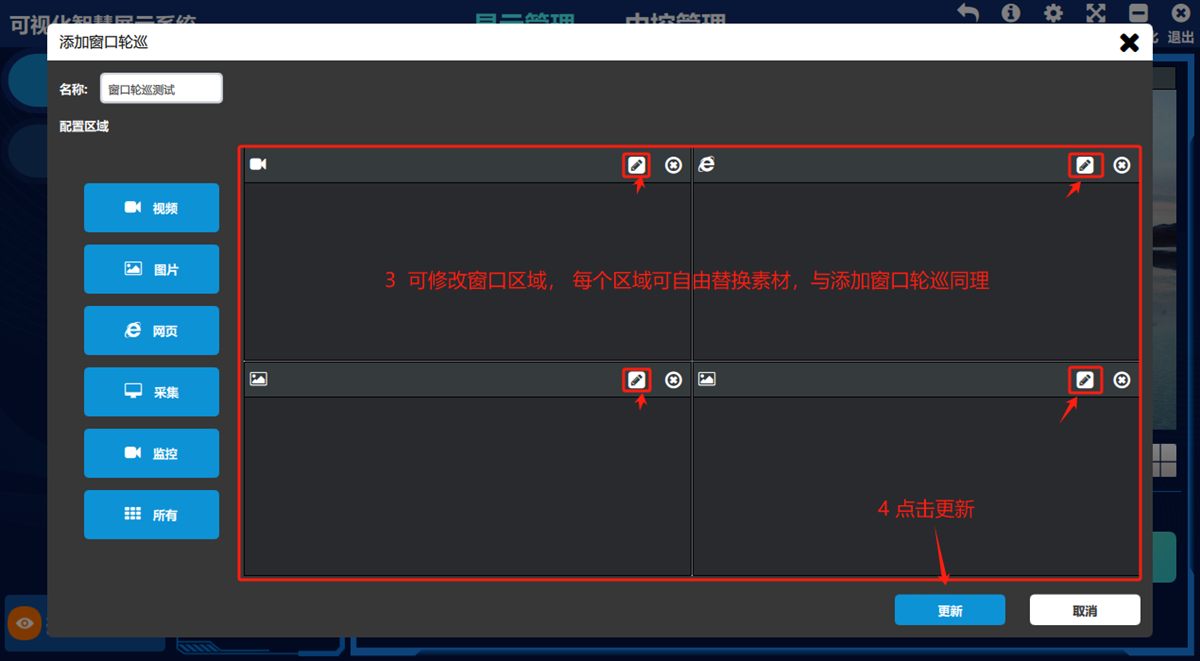
- ③ Add or remove asset tour windows freely, replace assets freely, change the tour interval and so on
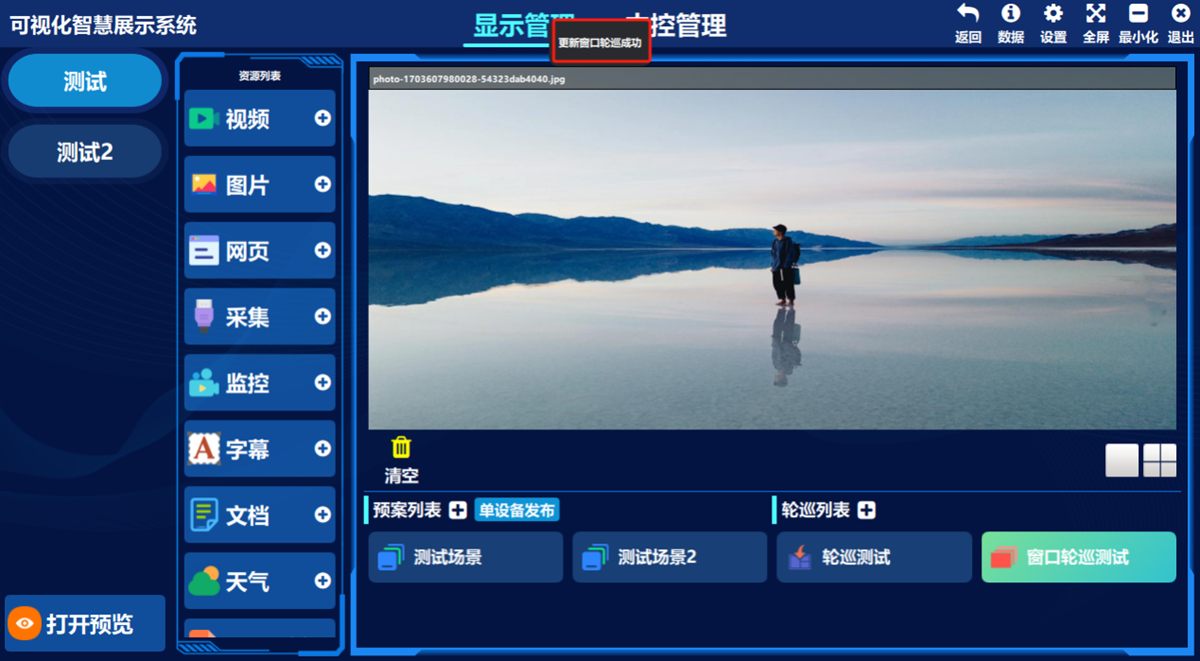
This works the same way as adding a window tour: replace assets freely, then click 更新(Update).
The prompt confirming the update is all you need.
Was this page helpful?A one-line note helps us make these steps more accurate.